Friday, August 29, 2014

My new jewelry hangers.

I have been especially stressed out lately. I'm not typically a stressed person, but there have been a million things going on that are just out of my control. I'm not a control freak, but I like to know where things are headed. I have been planning on making some jewelry hangers for a while. When I get stressed I get extra productive. It worked out well in this case, because I now have some really cool jewelry hangers. We caught all the knobs on sale at Hobby Lobby for 50% off and spent about an hour picking them out. Husband wanted his own, kids wanted to pick out some... Yeah, it was a long process. But I loved what we wound up with. These are just some pictures of how I finished them.

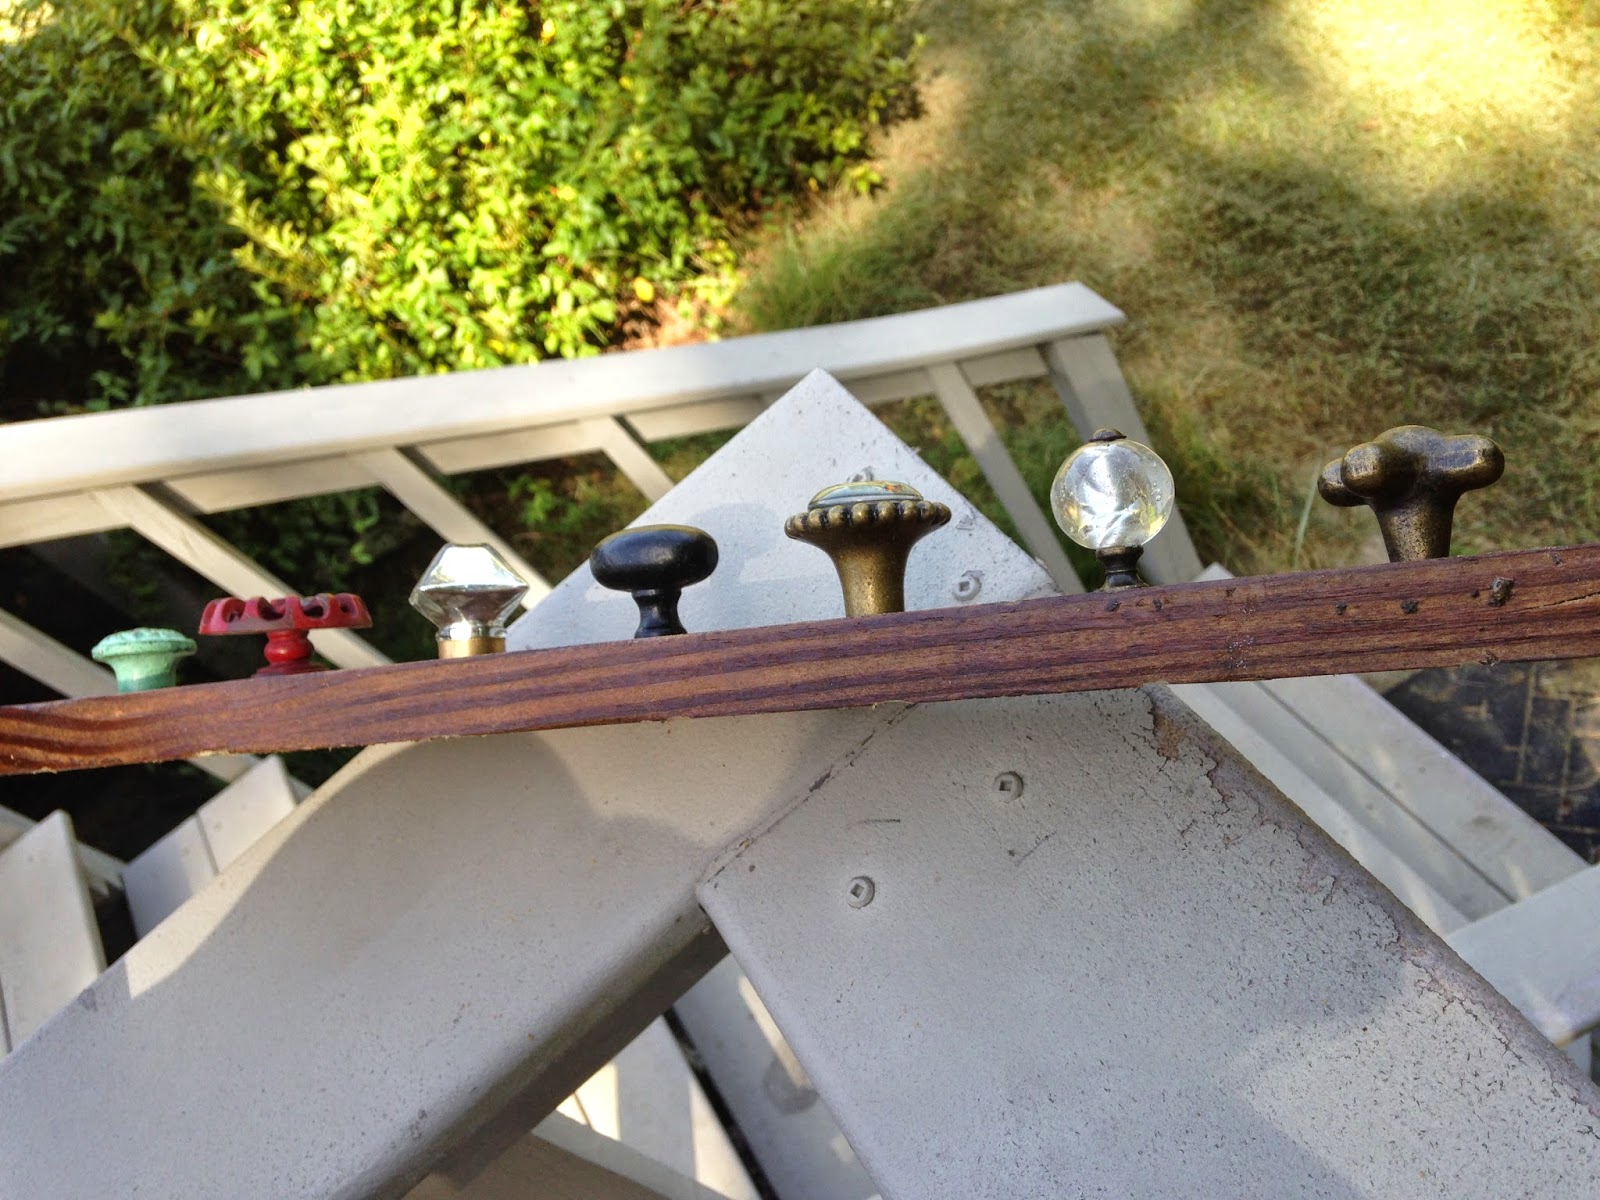
Had to cut the right length of board.
I found some wood left by the previous owners of our house under the porch. It was perfect. As you can see, I didn't have any big saws or anything else out. Since we moved we don't have a workshop and it was easier to just cut it than to go to my MIL's to do it. I just decided what length I needed, cut it, and took it to my kitchen sink and washed it off.  Also, please don't judge me below. I was still in pajamas. It was just one of those days. :/ My daughter decided to snap some random pictures so I thought I'd use one.


I measuerd all mine 2.5 inches apart and left that same amount hanging off each end. It balanced nicely.

Drilling some holes.

Counter sunk holes.
I did stain and polyacrylic the fronts before I added the knobs, but most people want the really distressed look now. If that was what I wanted I wouldn't have done anything to it. These are the drilled holes with the knobs and nuts already screwed in. I didn't need the washers. I used 2 drill bits for these holes. I did the smaller part first with a 1/4 inch bit (I think). Drilled those all the way through, then put on a 1/2 inch bit and drilled about halfway through the wood. I did it slowly and had no problems at all. I have never done this before so I was surprised I didn't screw it up. It was easy.


Then my DH used a sawzall with a diamond blade and shaved off the extra length from the knobs. I could have done it, but he likes using the saw. It does look like a tiger stripe on the back of it but you can't tell anywhere else. We could have gotten the grinder out and the back would have been much prettier, but seriously, who's looking at the back when it's on my wall?

He's so helpful

You can't see the saw marks even from the top.
We wound up with something that made us both very happy. We each have our own. I was so happy with the way it came out. There are teeth type picture hangers on the back. One on each end. It sits almost flush with the wall. He loved all the weird knobs, especially the dog head. Too bad they didn't have any breed specific knobs. K9 officers have one track minds sometimes.

This is mine.


This is is TJs.


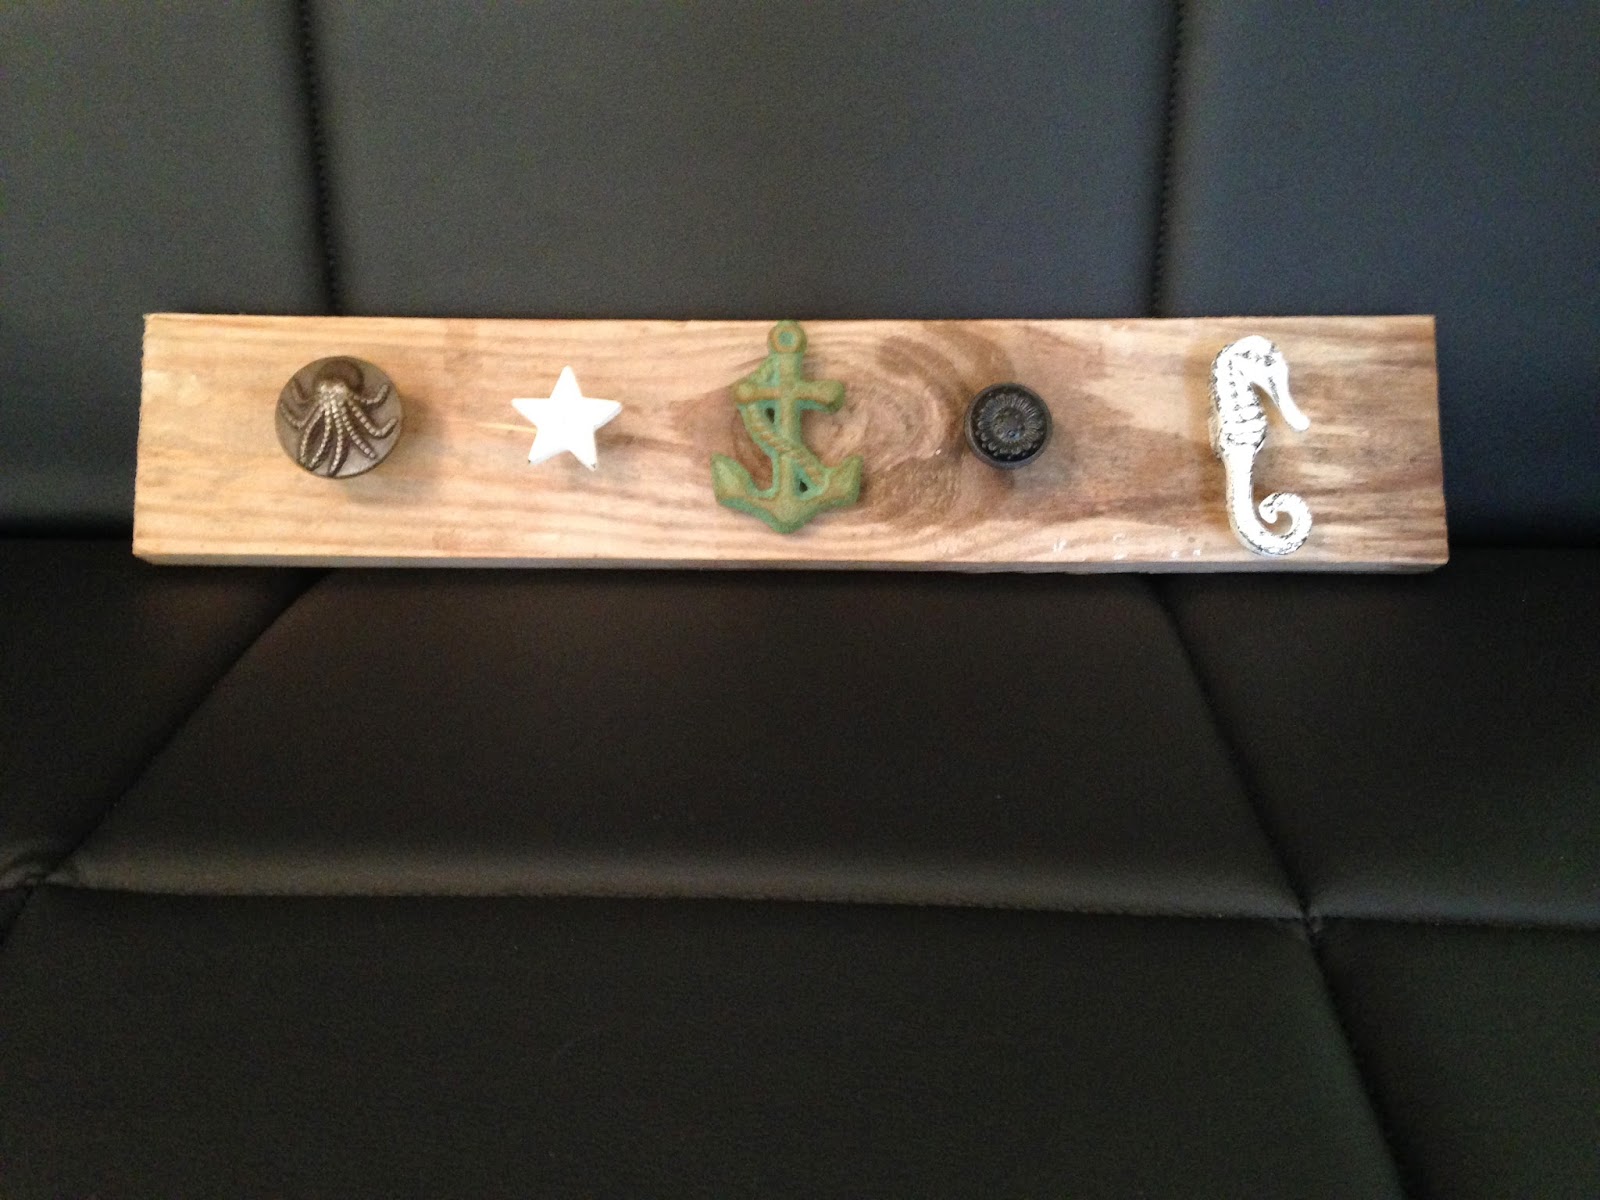
And the first one I actually made was for my MIL's birthday. She has beachy stuff all over her house so we were able to find the perfect knobs for her. She loved it. Hers is going to have 2 screws attached to each corner and wire wrapped around them so that it will hang on the wall like string for a different look. Fits her house perfectly.

MIL's birthday present.

 So there you go. Fairly easy to make your own cute, custom jewelry hanger. I'm going to make an earring holder from the long cabinet and door handles at some point. Those are already bought and at home too, just haven't had time.

On a side note, if anyone see any knobs anywhere police related, please let me know! I think it would be awesome to have one to put in his office. I say jewelry holders, but it could be a coat rack during the winter as long as it's hung well.

post signature

Tuesday, September 17, 2013

How to Make a Dryer Vent Pumpkin


As most of you know, we have been getting our new house set up. Excitement is running rampant around our house right now. We should be moved in by the beginning of October. This weekend we got a lot of things accomplished. I made at least 10 trips to stores because I kept thinking of more things that I needed. I made 2 trips to get laundry detergent. I finally remembered it on the 3rd trip. I'm telling you, moving is exhausting. My mind has been in a million different places lately. When I realized I still forgot laundry detergent on the 2nd trip, I decided I needed a break from unpacking... organizing... making a bigger mess... whatever you want to call it. So I made one more trip out to get some supplies for a craft which always cheers me up. When I got back home I got out (ha. Got out... who am I kidding? It's been sitting on top of the dryer since we hooked it up 3 weeks ago.) the part of the dryer vent we cut off when we moved our dryer in and headed to the garage.

I got set up on my piece of newspaper with the garage doors open. I used orange Rust-O-Leum paint since it was going on metal. 
I just sprayed as evenly as I could. The paint stuck great. I made sure to spray the ends well and got under the vent as much as possible from this side.
Coming along nicely.
I left it there to dry on that side and turned it over once it completely dried. I waited a couple of hours and went back to unpacking since I felt a little better about my wasted trips to the store. After the first side was completely dry and no longer felt tacky I flipped it over to paint the other side,
The paint went on great. It's still wet here after painting the 2nd side.
I left it there another couple of hours so that the paint would be totally dry so I could connect the ends. For my purposes, I just held the two ends together and wrapped Gorilla tape around them and painted it orange as well. The back side of mine will be completely hidden so it didn't matter if it had tape on it. Originally I thought it had been going somewhere that would show off the entire thing. If that's your issue I would use a wire wrap method. Just hold the ends together, wrap thin wire around them like you would tape from one side to the next, and then wrap a small loop of wire around itself to hold in place. Since the vent is notched it will be barely noticeable. Then you could just throw a leaf over the top and it would be even less noticeable.
After I taped and painted it and brought it inside.
I bought apple cinnamon scented oil and dark reeds which I held together with rubber bands to make my stem. It's cute and gives off a nice smell. Two of my favorite things: Good looks and good smells. I stuck some fake leaves inside the rubber bands as well and just let them branch out.
My supplies. Just stick it all together and sit in the bottle of scented oil.
My finished product turned out great and was really simple. Other than drying time for the paint it took me less than 30 minutes. My total cost was under $15. Now I'm excited about making more fall and Halloween stuff, especially when it gives me an excuse not to unpack for a few minutes. 

Maybe it's just because I made it, but I think it turned out great. It's perfect for my mantle.

Supplies:
Dryer vent - $0 (already had it)
Orange Rust-O-Leum paint - $5
Apple Cinnamon Oil - $1
Decorative Reeds - $3
Fake leaves - $2
Rubber bands - $0 (already had it)

Until next time.
post signature

Friday, September 6, 2013

Enter: The Lilac Zone.

We're making progress with our move. Right now it seems like with every move there's always at least one room that needs painting. In our new house that room was the one going to our 4 year old daughter. Let's just say that she disliked hated burgundy. Not even an option to leave it. Let's also say that I was not a fan of the flowered burgundy and hunter green border. It was old school home interior style. Uh, no thank you.
This border was NOT happening in Bacon's room.
And then there were the curtains. I'm sure they matched whatever was in the room and it looked fine, but they were not for us at all. 
Curtains, valances... too much of this color everywhere.
Since Bacon was saying no way to the room color and I was saying the same to the border, hubs and I decided to paint. Picking a color was the easy part. It went like this: "Bacon, what color do you want your room?" "Purple." "Do you want to think about it to make sure that's what you want?" "Sure... okay, I thought about it. I want purple." She did want dark purple (her last room was magenta) but we talked her into light purple. Mainly because later on we don't want to get stuck painting over another dark color. We took her to pick out her color and get it mixed. We bought primer and had it tinted as well. It was a little more expensive but well worth it.

Before we could paint we had to get that border off. It was the worst part by far. We looked up all kinds of information on removing wallpaper since we had never done it and found that there's a spray you can use to break the glue down. You also have to buy a scoring tool to use before the spray so that it can penetrate the wallpaper. There were also lots of people who said that didn't work and they wound up scraping the glue off anyway. We tried a different method and it worked well for us. I have a Shark Portable Steam Pocket that I love. The hubby did a great job using it. We just put the direct steam nozzle on it and steamed the border off. It wasn't the quickest process because it's made to clean with so it doesn't get super hot, but it worked and that's what we were going for.
He's so helpful. Anything for his girls. =]
We did have to scrape it, but not a lot. We just bought a paper scraper and used it. It was easier on the hands than a regular blade. This is what it looked like after we scraped it. You can see one wall still has the under layer of the border attached while the other doesn't so you can tell the difference.
The little bit of glue was just smearing at this point so it was flat. We didn't want to saturate the sheet rock with water, so we left it.
We scraped all 4 walls until they just had the little glue remnants on them. We left it just like that and put tinted primer on top of it. You can't even tell there was a little glue left. 
We did one wall at a time. It was easier for us that way because it was hard  on the arms to continue scraping all 4 in a row.
After adding tape and 2 coats of tinted primer it looked like this. We didn't originally tape because we thought pulling the tape off might damage the popcorn ceilings. (Only the rooms we want to paint have these ceilings of course.) Our bad edging due to the popcorn was damage enough, so we taped. You can't even tell it was taped since we pulled it off.
Taping saved tons of time and painstaking edging work.
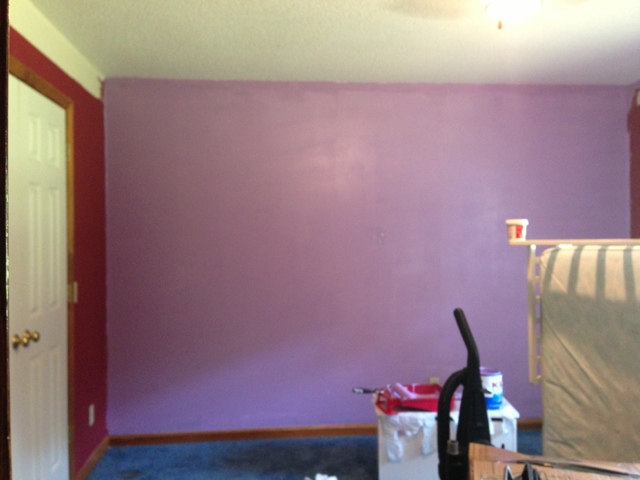
And after 1 coat of paint it looked like this. As you can see our little one is very happy with the end result. 
She loves that closet.
TJ finished painting while I was at work so when I got home I started unpacking, cleaning, and rearranging.
Her little bed will be gone on Christmas. Getting too big so a new one is coming.
"Mom, this looks AWESOME!"
This white furniture will be gone soon. I think she wants black.
I still need to empty the closet. It's got some boxes in it. I plan on putting an actual closet organization system in it but that won't be happening right now. We've got to get moved in first. Hopefully I can get it started by the beginning of next year. It's going to take some planning for sure, but it should eradicate the need for most of her furniture. That's what we're ultimately going for so that they have more room to play. We still have some art to hang on the walls and her tv will be hanging also. Other than that we're finished with her room. This took us about 4 days to paint because we only worked on it at night after work. We could've done it in a day because the primer and paint dried surprisingly fast.

We will be working on B's room next. We're not sure if we're even going to paint it. He hasn't decided what he wants as of right now. I guess we'll see.

- jFree <3

Wednesday, September 4, 2013

Dinner is about to get easier.

I'm done! I'm finally done! Okay, I know that sounds like some dreadful task is over but it's not the "I'm done!" of relief, it's the "I'm done!" of excitement. Seriously. I know I'm a little sad for looking at my new menu planner and being super excited, more so than any other time in the past month almost, but oh well. It's awesome and I'm happy. I won't drag it out. Here's how it went down...

I saw the original post on Pinterest. I thought that it was an exceptional idea from The Thinking Closet. Hers looked so good, but I needed to make it my own because hers didn't match my style. I talked to the hubs and we decided the idea would probably work for us, so I started on a menu list. Nothing spectacular, just jotting down meals we like (and that I'm capable of cooking since I'm a novice) on a piece of paper when we happened to think of something. I've got almost 40 items on it so far and I'm still adding to it. Then we bought this stuff.
Magnetic whiteboard. I liked the sharp corners. Made for very clean lines on the finished product.
Card stock, medium clothespins, larger and smaller wooden letters that were paintable, acrylic paints, and some cheap paintbrushes. We also bought black fabric, patterned fabric, 3/4 inch ribbon, spray adhesive, and index card holders since all of our stuff is packed up for now.


After we bought that stuff, I sat on my bed and painted each one of these different colors. The OP had all the letters nice and uniform and a patterned background. My background is solid so I went with bright letters and decorations. 
I was a little disappointed when I realized that all the bigger letters weren't uniform in size even though they came from the same pack, but in the end they looked fine. Also, my smaller pack only had 1 "T". I had to make the other from different letters. Hopefully you can't tell which.
By the way, I don't know if I've ever mentioned but my hubs is top notch. No doubt. He helps me with anything I need help with. You'll see pics of him often. Here he is helping hot glue the fabric I got to the magnetic whiteboard. I didn't do like the OP and spray adhesive all over. I thought one day I may not want the menu planner anymore (doubtful but you never know) but the calendar would still be useful. 
Look at him go! He said "Don't post pictures of me doing this. I like my man card." haha... oops.
Here it is with its nice tucked in corners and tight sides.
I think we make a great team.
Then we added a border. We went with a solid color since our letters were different colors and we didn't want it to be too busy. We weaved it over and under for a nice pattern. There is hot glue under the 4 ends that are on the bottom of the weave so it can't be seen and around the back where the ribbon attaches to the whiteboard.
After that we hot glued our 4 larger letters to spell out M-E-N-U and one of each of the smaller painted letter to 7 clothespins for our days of the week. Here we are putting magnets on the back of our clothespins after we hot glued the letters to them. I know it looks like I'm not doing a thing but I promise I am! =] We bought a roll of adhesive magnets and cut our magnets to size so that they would fit on the clothespins without being seen.
The magnets cut down really easily. I cut them with a pair of my kids school scissors.
This was the result after all that.
Our next to last step was to put boxes on our board. I bought 3 index card holders and cut off the flaps that close them (I was going to make boxes from cardboard and have a layout if anyone would rather do that but these were easier and perfect size for my board), then cut my fabric to fit. I left about an inch hanging out all the way around the top and enough on the sides so I could fold the sides like I was wrapping a present. I sprayed adhesive all over the outside and stuck my fabric down. Once it was glued down I cut lines down the edges of the extra fabric at the top, sprayed the fabric with adhesive, then pushed it inside so that it covered the boxes completely. Then I stuck magnets to the backs instead of gluing the boxes down so I could take them down since anything open winds up getting dirty inside. At least I can shake them out this way. Or change fabric if I ever want to. I wanted 3 boxes so I could have one just for desserts. I like to make one or two a week. The 2 other than the dessert box are for menu cards. One for new recipes and one for recipes we've used. When the "new" box gets empty we just take the cards out of the "old" box and start our rotation over. As it looks right now we won't be eating the same thing for about 6 weeks unless we just want to. This was my almost finished result.
Then the time came for the menu cards. These were my least favorite part of the whole project. They weren't fun. Just typing. OP had already made a layout in Microsoft Word which I downloaded from her original post so I didn't have to worry with that. I just had to fill in the names of meals and ingredients. I covered them with packing tape and cut to size after I had them all printed.
Maybe one day I can add better quality pictures when i get my good camera unpacked. :/
The names of the recipes are on the front and the ingredients are on the back. Make sure you know how your printer prints and do left to right on the front, but right to left on the back so that they line up correctly.
I will eventually redo all of these cards because I plan on making my own recipe binder. Once I get that made, I'll reprint all the cards with a page number on them so I can easily find it. I don't have recipe books. All mine are from family, friends, or Pinterest. Now all I have to do for my weekly grocery shopping trip is pick out 7 cards, flip them over, and add my list of ingredients to my Weekly Menu Planner List which is printable and fillable in Word. I can choose sides to go with the entrees and get it all written down together. I also made a printable shopping list to go with it because I think the sectioned list works best for me while I'm actually in the store. So my end result turned out like this. Also, my menu cards are color coded. I have a different color for Easy, Red Meat, Chicken, Pork, Seafood, and Soups so far.


I'm 110% happy with it. If anyone decides to make one, send me pictures. I love different ideas. My supply list is below in case anyone was wondering. The whole project cost about $35 but could have been much less. Since we're moving all my craft stuff is packed up so I had to buy everything new. I also bought a more expensive whiteboard because I liked the bigger size and square edges. You can find them for around $9 all the time.

Supplies:
1 - 16X20 magnetic whiteboard
hot glue gun and glue
1 - yard black fabric
1 - 18in X 21in piece of patterned fabric
80 inches of 3/4 in grosgrain ribbon
wooden letters (large and small)
7 - medium clothespins
3 - plastic index card holders
spray adhesive
cardstock in different colors
packing tape

Good luck making your own!

-jFree <3

**UPDATE: I got my menu planner hung up in the new house and I love it.**

This thing is great!