Tuesday, October 1, 2013

Tension Rod Bakeware Storage


One day I PROMISE I will stop taking pictures with my phone and use a better camera. When I get it unpacked. 

I know I am not the only person who pulls out half of their pans to get to the one they need on the bottom. This is so frustrating. I have honestly decided not to cook certain things because the dishes were too much of a pain to get to. This is what I'm working with.

Left side of my bakeware cabinet.
Right side of my bakeware cabinet.
 I do have a few things that won't fit in here, but these are the main ones I use so I keep the others in a different cabinet. Isn't that a disgusting mess? Ugh. Since we're in the process of setting up the kitchen right now, I decided I would get this under control before we even got moved in. I just couldn't stand looking at it. I had seen an idea on Pinterest where someone (sorry I don't know who!) had used tension rods to separate their pots and pans. Since this makes it adjustable I decided it would be the best route for me to go. I found the best fit for me for the best price at Lowe's. I bought 10 to start off with. I will need more, but not for this particular cabinet and since we're unpacking I didn't want to have to store extras. We'll be making lots of trips to Lowe's soon so it's not a big deal. I set them up one at at time with specific widths for specific items. The original idea I saw used 2 rods per separation but one worked fine for me and cut my price in half. All I had to go was push them into place.


After I got my rods set up, I put my dishes back in. It looks SO much better and is much more manageable. Even my husband who is very helpful but doesn't care a thing about the kitchen was happy with it. I made sure to put my shorter things on one side so that I would have a little room in the front for a couple of extra dishes that didn't fit anywhere else.
Pulling things out without having to pull everything out is a win.
This project was a total success and will be repeated in other cabinets soon. It took me about an hour to completely finish this cabinet. It cost me less than $20 which was much cheaper than the expensive dividers I had originally been looking at.

Supplies:
8  - 18in-28in tension rods  - $2.27 each


post signature

Friday, September 20, 2013

Cleaning Cabinet Revamp

Before I put my cleaning stuff in my cleaning cabinet under the kitchen sink I decided I was not going to be removing 10 things to get to the 1 thing I needed way in the back because in my old house that"s exactly what always happened. Like almost everything else I do, I got inspiration for this organizing project from some genius person. It's such a great idea. Before I could do anything I had to buy a tension rod long enough and clean my new cabinet out. Cleaning the cleaning cabinet... I feel like there's something wrong with that. Anyway, I left the piece of linoleum in there so it would save the wood if things got spilled. That piece is easily replaceable, the wood is not.
This was after I wiped it down. No dust or gunk in it anywhere.
 Then I put my tension rod in. I tightened and tightened and tightened and then I tightened some more. When I felt like it was stable I started putting my stuff in.
Doesn't look like much at this point.
 I happen to have 2 side shelves in my cabinet so I put things on them first. Right side has pet shampoo, flea spray, bug spray (no spiders for me thank you), and mosquito spray because we have a ton here. The left side has furniture cleaner because we got a lot of really good stuff when we bought our furniture 3 years ago. It still looks new so it was worth it. Everything else except for spray bottles went in the bottom. I keep my sponges in a basket because I use them all the time and they tend to fall everywhere after you open the pack. The items I use the most are in the front for obvious reasons. Then I hung up my spray bottles. Let me just say my tension rod was not nearly as stable as I thought. Putting the weight on it made it move. So I went back to tightening. It does have a little curve to it but it is holding up nicely. It's been there for about a week now and hasn't moved at all.
 The hubs did say since he liked it he was going to install a wooden rod so there was no curvature. We'll see how that goes. He's busy too. If he does I'll post an updated pic. For now I have lots more space. It's always best to go up when you can because most vertical space just gets wasted. I've been wasting my vertical space for years, I'm just not doing it anymore. If anyone has any suggestions let me know. I'm always up for better ways to do things.

Supplies:
1 - 32"-48" tension rod - $2.17


post signature

Friday, September 6, 2013

Enter: The Lilac Zone.

We're making progress with our move. Right now it seems like with every move there's always at least one room that needs painting. In our new house that room was the one going to our 4 year old daughter. Let's just say that she disliked hated burgundy. Not even an option to leave it. Let's also say that I was not a fan of the flowered burgundy and hunter green border. It was old school home interior style. Uh, no thank you.
This border was NOT happening in Bacon's room.
And then there were the curtains. I'm sure they matched whatever was in the room and it looked fine, but they were not for us at all. 
Curtains, valances... too much of this color everywhere.
Since Bacon was saying no way to the room color and I was saying the same to the border, hubs and I decided to paint. Picking a color was the easy part. It went like this: "Bacon, what color do you want your room?" "Purple." "Do you want to think about it to make sure that's what you want?" "Sure... okay, I thought about it. I want purple." She did want dark purple (her last room was magenta) but we talked her into light purple. Mainly because later on we don't want to get stuck painting over another dark color. We took her to pick out her color and get it mixed. We bought primer and had it tinted as well. It was a little more expensive but well worth it.

Before we could paint we had to get that border off. It was the worst part by far. We looked up all kinds of information on removing wallpaper since we had never done it and found that there's a spray you can use to break the glue down. You also have to buy a scoring tool to use before the spray so that it can penetrate the wallpaper. There were also lots of people who said that didn't work and they wound up scraping the glue off anyway. We tried a different method and it worked well for us. I have a Shark Portable Steam Pocket that I love. The hubby did a great job using it. We just put the direct steam nozzle on it and steamed the border off. It wasn't the quickest process because it's made to clean with so it doesn't get super hot, but it worked and that's what we were going for.
He's so helpful. Anything for his girls. =]
We did have to scrape it, but not a lot. We just bought a paper scraper and used it. It was easier on the hands than a regular blade. This is what it looked like after we scraped it. You can see one wall still has the under layer of the border attached while the other doesn't so you can tell the difference.
The little bit of glue was just smearing at this point so it was flat. We didn't want to saturate the sheet rock with water, so we left it.
We scraped all 4 walls until they just had the little glue remnants on them. We left it just like that and put tinted primer on top of it. You can't even tell there was a little glue left. 
We did one wall at a time. It was easier for us that way because it was hard  on the arms to continue scraping all 4 in a row.
After adding tape and 2 coats of tinted primer it looked like this. We didn't originally tape because we thought pulling the tape off might damage the popcorn ceilings. (Only the rooms we want to paint have these ceilings of course.) Our bad edging due to the popcorn was damage enough, so we taped. You can't even tell it was taped since we pulled it off.
Taping saved tons of time and painstaking edging work.
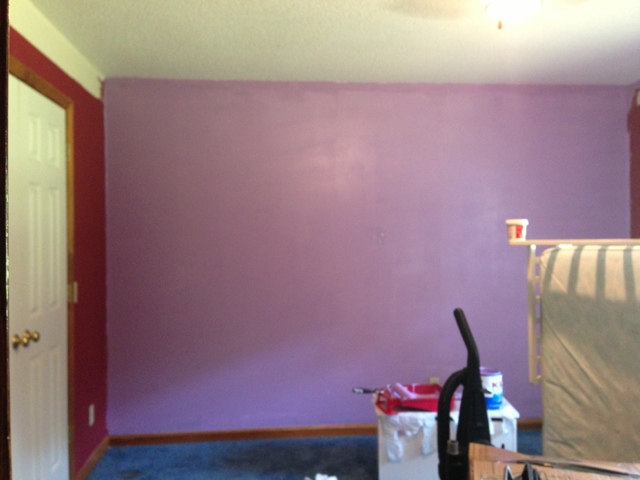
And after 1 coat of paint it looked like this. As you can see our little one is very happy with the end result. 
She loves that closet.
TJ finished painting while I was at work so when I got home I started unpacking, cleaning, and rearranging.
Her little bed will be gone on Christmas. Getting too big so a new one is coming.
"Mom, this looks AWESOME!"
This white furniture will be gone soon. I think she wants black.
I still need to empty the closet. It's got some boxes in it. I plan on putting an actual closet organization system in it but that won't be happening right now. We've got to get moved in first. Hopefully I can get it started by the beginning of next year. It's going to take some planning for sure, but it should eradicate the need for most of her furniture. That's what we're ultimately going for so that they have more room to play. We still have some art to hang on the walls and her tv will be hanging also. Other than that we're finished with her room. This took us about 4 days to paint because we only worked on it at night after work. We could've done it in a day because the primer and paint dried surprisingly fast.

We will be working on B's room next. We're not sure if we're even going to paint it. He hasn't decided what he wants as of right now. I guess we'll see.

- jFree <3

Wednesday, September 4, 2013

Paperwork Chaos Undone.

My kids started back to school earlier this month. They are loving it. My 4 year old, Bacon, seems to love everything about Pre-K but she especially loves the bus. I never let my 8 year old, B, ride the bus before, but since his sister wanted to this year we decided to try letting them ride it home. My anxiety level was through the roof for the first week but I've gotten over it now. They enjoy it and honestly it saves us some time and hassle. It comes by much too early in the morning for them to ride it to school. Thankfully B is liking the 3rd grade. He changed schools this year to a MUCH better district and it seems to have done him well. A huge difference is this school actually sends home paperwork. Looots of paperwork. Mix that with the mail that has been coming in and I've got a mess. Staying at the MILs is helpful money wise but we don't have a lot of space. One bedroom for us, one for the kids to share.
The kids have a good setup and have done surprisingly well in the same room.
Our pit bull, Roscoe, LOVES to photobomb. You'll probably see a lot of him.
Here he is again. At least he takes some of the attention off the mess.
I can't seem to break the hubby's habit of dropping everything right beside the bed, including his horde of Girl Scout cookies. (He's a Thin Mint junkie.)
Our YorkiePoo, Baylor. She does not sleep with us. Our dogs are inside but aren't allowed on the furniture. As you can see, she got an opportunity and sneaked right into Dad's spot.
As you can see we've done well with the space provided. Other than the t-shirts my husband refuses to throw anywhere but everywhere and the desk. Oh, the desk. It has been the bane of my existence for the past month and I have been ignoring hoping it would just clean itself. Didn't happen. So I took all the papers off and got them in a pile.
This is just part of them. They're everywhere.
That is what I got. That doesn't include all the papers I've been storing at work and in my purse. Papers everywhere. I also have refund checks from every bill we had. This is good news for us. My system of paying every 4 weeks instead of once a month has paid off. Woohoo! Maybe a post on budgeting sometime... Anyway, then I went shopping for supplies. Let me tell you, I'm a cheap shopper. If I can find a deal, that's what I'm doing. 

My steps were this: 
1. I got 2 plastic milk crates (1green, 1pink)! from Walmart for $3.97 each. I also "borrowed" some recycled file folders and tabs from my office. (My boss is great.) 
2. Decided to make one file for each grade per kid. 
3. I make binder covers every year, so I printed off an extra copy to put in the front of each file in case the tab pops off.
Bacon's binder cover this year. She loves
purple and stars.
B's binder cover this year. He loves
green and skulls.
4. I made tabs for the folders.
5. I put a couple of folders in each crate with tabs on them labeled with their current grade.
6. I put an extra folder in one crate so that we can put our paperwork in it while we're at the MILs. I'll move it to my normal filing spot when we get settled. 
My baby's first tag from school ever. *tear* We picked them up every day for the 1st week. 
The crates look empty but at the moment  they both only have one month of one grade in them. I figure that by 12th grade they'll be full.I thought about getting a box with a lid but for now it's more convenient to just drop stuff in. I may change later on. If so, I'm sure I'll still be able to find a use for these crates. I'm much happier with this than the method of "throw it on the desk and hope you can find it later".
Look at these little almost empty crates. B's will be half full by the time I put his paperwork from the past 4 years in it.
One big HUGE upcoming project for me is to create a homework command center. The kids aren't big enough yet to worry with a family command center. I know where they are at all times no matter what and I keep track of all appointments on my phone. But the homework command center will be a big help I think. Bacon brings home a monthly homework calendar and B has a weekly one in conjunction with the daily assignments he has to write down in his planner. They also have different lunch menus and memos from their schools, so I think one place to keep all of it central will be great. We'll see I guess.

**Afterthought: Isn't it CRAZY how much homework kids have these days? He has as much in 3rd grade as I did when I was in high school. Sometimes I just feel like they don't get to be kids anymore.**

-jFree

Friday, August 30, 2013

Hi there.


These are the 2 smallest loves of my life. Blaiklyn (lovingly referred to as Bacon) and Braden.
Okay... now to actually write. I've decided to make a blog because I want to record things for my children. I want them to one day be able to look back and say "My mom was awesome". Now seems like the perfect time to do so since my husband, 2 children, and I will be moving into our new home within the next couple of months. Hopefully sooner. Fingers crossed. Up until recently my outlet has been my children and husband. They're getting older (as all children do) which is bittersweet. They are turning into awesome little people instead of babies. They still take up all my time but they are old enough that they don't need every second of it. Husband has started trying to golf. I say trying because he's not very good. He does enjoy it though, so I say play on.

This is the biggest love of my life, TJ. And me. We're on a carousel.


I personally enjoy doing so many things I can't focus on just one. I plan on moving into a well organized place and trying to keep it that way. Organization is my true talent. I have lots of projects I plan on doing to get the house organized even before we get moved in. We're staying with my MIL for the period between selling our old house and closing on the new one. It's so nice to have that option. We are purchasing the new house from a family member so we're actually able to do things inside the house before we close, like paint. And I feel the need to show you some pictures now even though it still has other peoples stuff in it. Just disregard all that. Picture it empty and clean.
The fireplace. One of my favorite things about it.
I love that the oven is separate from the stove, which is a recessed downdraft stove.

The dining room.

And there's Bacon out in one of the fields while we took a walk around the property.
We're so ready to move! We love it. We love the space. I can't wait to be able to just go outside and do whatever we want. When we take the kids over they hit the backdoor and are gone. You can't see the house from the road either, which I love. Anyway, there's my introduction and the current status of me and mine. I won't post here everyday I'm sure because life gets in the way, but I will definitely be posting more.

-jFree