We're making progress with our move. Right now it seems like with every move there's always at least one room that needs painting. In our new house that room was the one going to our 4 year old daughter. Let's just say that she
disliked hated burgundy. Not even an option to leave it. Let's also say that I was not a fan of the flowered burgundy and hunter green border. It was old school home interior style. Uh, no thank you.
 |
| This border was NOT happening in Bacon's room. |
And then there were the curtains. I'm sure they matched whatever was in the room and it looked fine, but they were not for us at all.
 |
| Curtains, valances... too much of this color everywhere. |
Since Bacon was saying no way to the room color and I was saying the same to the border, hubs and I decided to paint. Picking a color was the easy part. It went like this: "Bacon, what color do you want your room?" "Purple." "Do you want to think about it to make sure that's what you want?" "Sure... okay, I thought about it. I want purple." She did want dark purple (her last room was magenta) but we talked her into light purple. Mainly because later on we don't want to get stuck painting over another dark color. We took her to pick out her color and get it mixed. We bought primer and had it tinted as well. It was a little more expensive but well worth it.
Before we could paint we had to get that border off. It was the worst part by far. We looked up all kinds of information on removing wallpaper since we had never done it and found that there's a spray you can use to break the glue down. You also have to buy a scoring tool to use before the spray so that it can penetrate the wallpaper. There were also lots of people who said that didn't work and they wound up scraping the glue off anyway. We tried a different method and it worked well for us. I have a Shark Portable Steam Pocket that I love. The hubby did a great job using it. We just put the direct steam nozzle on it and steamed the border off. It wasn't the quickest process because it's made to clean with so it doesn't get super hot, but it worked and that's what we were going for.
 |
| He's so helpful. Anything for his girls. =] |
We did have to scrape it, but not a lot. We just bought a paper scraper and used it. It was easier on the hands than a regular blade. This is what it looked like after we scraped it. You can see one wall still has the under layer of the border attached while the other doesn't so you can tell the difference.
 |
| The little bit of glue was just smearing at this point so it was flat. We didn't want to saturate the sheet rock with water, so we left it. |
We scraped all 4 walls until they just had the little glue remnants on them. We left it just like that and put tinted primer on top of it. You can't even tell there was a little glue left.
 |
| We did one wall at a time. It was easier for us that way because it was hard on the arms to continue scraping all 4 in a row. |
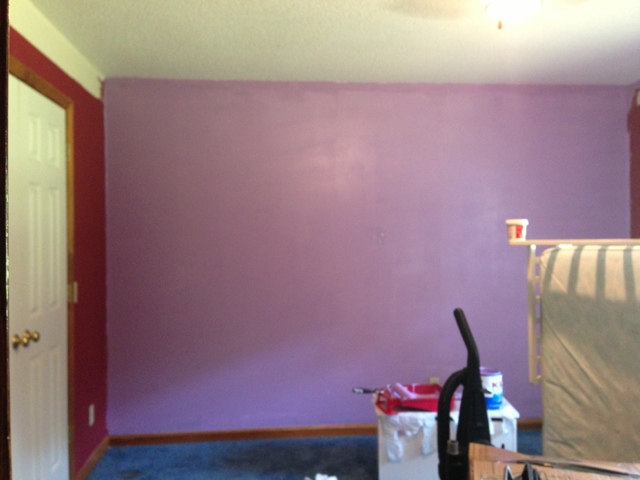
After adding tape and 2 coats of tinted primer it looked like this. We didn't originally tape because we thought pulling the tape off might damage the popcorn ceilings. (Only the rooms we want to paint have these ceilings of course.) Our bad edging due to the popcorn was damage enough, so we taped. You can't even tell it was taped since we pulled it off.
 |
| Taping saved tons of time and painstaking edging work. |
And after 1 coat of paint it looked like this. As you can see our little one is very happy with the end result.
 |
| She loves that closet. |
TJ finished painting while I was at work so when I got home I started unpacking, cleaning, and rearranging.
 |
| Her little bed will be gone on Christmas. Getting too big so a new one is coming. |
 |
| "Mom, this looks AWESOME!" |
 |
| This white furniture will be gone soon. I think she wants black. |
I still need to empty the closet. It's got some boxes in it. I plan on putting an actual closet organization system in it but that won't be happening right now. We've got to get moved in first. Hopefully I can get it started by the beginning of next year. It's going to take some planning for sure, but it should eradicate the need for most of her furniture. That's what we're ultimately going for so that they have more room to play. We still have some art to hang on the walls and her tv will be hanging also. Other than that we're finished with her room. This took us about 4 days to paint because we only worked on it at night after work. We could've done it in a day because the primer and paint dried surprisingly fast.
We will be working on B's room next. We're not sure if we're even going to paint it. He hasn't decided what he wants as of right now. I guess we'll see.
- jFree <3


